In a hurry? Skip to Step 1, then come back to the big idea.
What you need: a Windows or Mac computer, your Supervisor’s OK, about an hour, and a paid account you use only for work: a business plan (ChatGPT Business, or Claude Team or Enterprise), or a paid plan like Claude Max with training turned off. Never a free account or your personal home account. Prices are on Pricing & Plans.
First, the big idea: you’re the check
Today’s AI does a lot more than answer questions. It can go get documents, build a 20-slide PowerPoint, and fill a folder with files while you watch. It can also get things wrong and sound completely sure about it. That’s called a hallucination.
Here’s what fixes that: you. Not a longer prompt, and not asking the AI to check itself. If you could do the job yourself, the old way, you’re the best person there is to judge what the AI made. You’ve trained poll workers, so a wrong training hour on slide 14 jumps out at you the moment you read it.
So the habit is simple, and it’s common sense:
- Read every page. If it made a 20-slide deck, read all 20 slides, the way you’d read a new coworker’s first draft.
- If it’s outside what you know, hand it to someone who knows. The qualifying officer reads the candidate packet. Your attorney reads anything legal.
- Start with jobs you could do yourself. That’s what makes you the right person to check them. Your first project, below, is one you already know.
Step 1: Install the desktop app
We’re not using the website. We’re using the app. Here’s why: on the website, you hand the AI one file at a time and download what it makes, one file at a time. The desktop app works right inside a folder on your computer. It can go get documents from the internet, save them in the folder, build files next to them, and fix them when you ask. You open the results from the folder like any other file.
Pick one:
- Claude desktop app (Windows or Mac). Install it from Anthropic (install steps) and sign in. Folder projects happen in the Code tab. That’s Claude Code, and it needs a paid plan: Pro or higher.
- ChatGPT desktop app (Windows or Mac). This is the new app with Chat, Work, and Codex in one place. On Windows, get it from the Microsoft Store (Windows app) and sign in. Folder projects happen in Codex, in a local project folder. Use a paid plan, not the free one.
Which one? If your office already pays for one, use that. Otherwise, pick either. They both do everything on this site. Every example here uses the Code tab in Claude or Codex in ChatGPT. Not the regular chat, and not Cowork or ChatGPT’s Work mode. One difference: ChatGPT can make pictures, and Claude can’t. If your county already pays for Microsoft Copilot, see Microsoft Copilot for where it fits. The full comparison is in Which Tool for Which Job.
Step 2: Turn off training (two minutes)
Training means the AI company uses your conversations to help build future versions of its AI. On personal and individual plans, you control this setting. Do it before your first project.
Claude (Pro, Max, or Ultra plan)
- Click your name to open the menu.
- Choose Settings, then Privacy.
- Turn off Help Improve our AI models.
Anthropic says turning this off keeps new chats out of training and stops it from using your earlier saved chats in future training runs. It can’t undo training that already happened.
ChatGPT (Plus or Pro plan)
- Open your account menu.
- Choose Settings, then Data controls.
- Turn off Improve the model for everyone.
Turning training off doesn’t delete your saved chats. They stay in your history until you delete them.
Business plans
Claude Team or Enterprise and ChatGPT Business or Enterprise don’t use your chats for training by default. Your office’s admin manages the settings.
Settings screens change. If yours doesn’t match, check the vendor’s help page: Claude or ChatGPT. More on how training works: Will They Train on Our Data?
Step 3: Make a folder
Every project gets its own folder. Make one main folder for all of them, then a folder inside it for each job:
E:\AI Projects\
├── Poll Worker Decks\
├── Name Badges\
├── Candidate Qualifying 2026\
└── Early Voting Maps\
Put the main folder wherever works for you:
| Where | Good for |
|---|---|
C: drive (like C:\AI Projects) | Simple and fast. Everything stays on this computer. |
| OneDrive | Backed up automatically, and you can open the results on another computer. If OneDrive ever says a file is locked or in use, pause syncing while the AI works. |
An external drive (like E:\AI Projects) | Portable. Unplug it and lock it in a drawer at night. Back it up now and then. |
Open one project folder at a time, not the main folder. The AI can see everything in the folder you open, so a project folder keeps it focused on one job.
Want a head start? You don’t need this for the first project below, but it saves time on the next ones. Download the starter folder (zip). Right-click the file, choose Extract All, and copy what comes out into your project folder. It holds a CLAUDE.md (a short instructions file the AI reads at the start of every session), a notes log, an empty file for the requests you want to reuse, a one-page safe use card, and a README with the steps. Everything in it is generic and made up, so nothing in it comes from a real office. Rather have single files? CLAUDE.md, NOTES.md, PROMPTS.md, SAFE-USE-CARD.md, and README.md are each here.
Step 4: Your first project, two poll worker decks
You’re going to ask for two PowerPoint presentations built from the state’s Polling Place Procedures Manual (PDF): a short one for people on the fence about being a poll worker, and a detailed one for people who’ve signed up. You know this material, so you’ll spot anything that’s off.
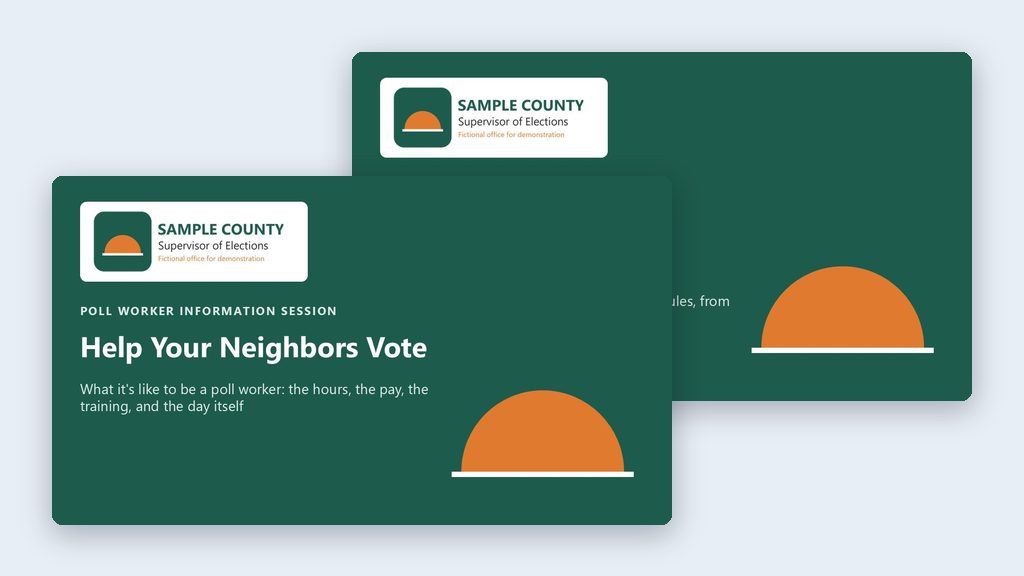 Example output
1. Make the folder
In File Explorer, open your main folder and make a new folder called Poll Worker Decks.
2. Open it in the app
- Claude: open the Code tab. Before you type anything, use the row under the message box: choose Local, then click the folder control, choose Open folder…, and pick
Poll Worker Decks. (Older versions of the app put these controls above the message box.) - ChatGPT: open Codex, click Add new project (or press Ctrl+O; Cmd+O on a Mac), and pick the
Poll Worker Decksfolder. To add more folders to the project later, open its menu, choose Edit project, then Add folder.
3. Say what you want
Here’s the prompt. Say it out loud with a dictation app, or type it. Put in your county’s name.
Say it or type it
Build both decks
Go to the Florida Division of Elections website and download the latest Polling Place Procedures Manual. Use it to make two PowerPoint presentations and save them in this folder.

1. A high-level overview for people who are on the fence about becoming a poll worker. Cover the basics they'll worry about: how many hours, pay, training, and what the day is like.
2. A more detailed deck for people who have signed up. Go deeper, so it answers the questions they'll have before their first election.

Go to the [Your county] County Supervisor of Elections website and use its colors for the branding. If there's a logo on the site, put it on the title slide. Make the last slide of each deck a list of references with links.
Fill in anything in [brackets] with your own details.
Look at what that prompt does. It says what to do (two decks, for two audiences), what to use (the state manual, which it goes and gets, and your website), and what you want back (two PowerPoint files in this folder, with references). That’s it. No rules list. No special wording. That’s how you’d explain the job to a sharp new coworker, and it’s how every prompt on this site works.
4. Let it work
You’ll see it working: finding the manual, downloading it, reading it, looking at your website, and building the decks. It may stop and ask before it downloads or runs something. Read what it’s asking, then say yes. A few minutes later, it tells you what it made.
5. Read every slide
This is the step that matters most, and it’s why you’re the right person for this project. Open Poll Worker Decks in File Explorer. You’ll see the manual (a PDF) and two PowerPoint files. Open each deck and read every slide, top to bottom.
You know poll worker training, so read it like the expert you are. Does the Election Day timeline match how the day really goes? Are the hours and the training right? Is the pay this year’s, not last year’s? Anything off will stand out to you. If you want to see where a fact came from, the references slide at the end tells you.
6. Ask for changes
Found something to fix? Just say so, in plain words. The changes land in the same files.
Say it or type it
Fix what's off
The pay on the overview deck is wrong. Check the poll worker page on our website, fix it in both decks, and make the title slides use our navy instead of the blue.
That’s the whole method. Every project on this site works the same way: a folder, a request, the files, and you reading every page.
Context is king: start from what you already have
The more the AI sees of how your office already does things, the better its first draft. You don’t have to throw away years of work. Say you’ve customized your poll worker training deck with your county’s own procedures. Keep it. Give the AI your current deck along with the state manual, and it builds the new version from both.
There are two ways to give it your examples:
- Put the files in the folder. Your current deck, last year’s flyer, a few sets of past meeting minutes as PDFs.
- Or tell it where to look. “Go to our website and look at our last three meeting minutes. Use the same format for this one.”
Say it or type it
Update our deck from the new manual
Our current poll worker training deck is in this folder. Go to the Florida Division of Elections website and download the latest Polling Place Procedures Manual. Make a new version of our deck and save it in this folder. Keep our look, our county-specific slides, and our own procedures. Update everything else from the manual. Then list every change you made, including any statute reference or fact in our old deck that the manual no longer supports.
It can catch old mistakes, too. Comparing your deck with the current manual, it may find an outdated statute reference or a step that changed since you last updated it. That last line asks it to list them. Check each one yourself. You’re still the check.
What to bring: the materials your office already shares with the public, like the training decks you show poll workers, posted meeting minutes and notices, and published flyers and guides. The usual rule still applies: nothing with voter information, passwords, or anything confidential (before you put a file in a folder).
One-off jobs go in a folder too
Even a quick question about one file works the same way. Make a folder, put the file in it, open the folder in the Code tab or Codex, and ask. For example, with a new Division of Elections directive in the folder: “What does this directive ask our office to do, and by when?” The answer and anything it makes stay in the folder with the file.
Before you put a file in a folder
The AI can read everything in the project folder, so ask one question first: what color is this?
- Green: public documents and published numbers. Go ahead.
- Yellow: internal drafts, contracts, staff email. Clean out personal information first, and use your office’s approved business plan.
- Red: voter records and anything confidential. Never in the folder.
A file that comes out of a system, like a voter registration system export or a poll worker list, needs one more step. Delete every column that holds personal information first (addresses, dates of birth, phone numbers, emails, ID numbers, and any name the job doesn’t need), then put only the cleaned file in the folder. The full export stays out of the folder.
The full version, with the Florida law behind it, is on the Safe Use Framework page. And always: someone who knows the work reads every page before anyone else sees it.
What to try next
- Bigger jobs. Folder projects walks through a longer project on an external drive, start to finish, with more real examples.
- Help candidates. Candidate handbook quick reference turns the state handbook into a checklist and FAQ.
- Small office? The Small Office Quick Start has five projects for this week, one a day.
- When the basics feel easy. Advanced projects show what you can do next, like wall maps of every precinct and polling place.
- Get better at asking. How to Ask covers the three parts of a good request, follow-ups, and why AI can sound sure and still be wrong.